Category Archives: Instruments

Busy night at the xylophone factory

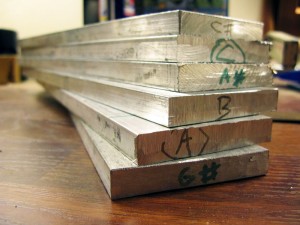
I got into a real rhythm last night and blew through a good 27 linear feet of aluminum bar stock, no rx cutting keys for the xylophones.

To the right here is what my shop floor looks like – thick with aluminum dust. I must have swept up 5 pounds of the stuff. (The logo on the floor reminds me not to crack my head on the face-height 6×10″ beam hovering just 5 feet off the floor –  I’m always standing up under it suddenly. Not for nothing is the beam called The Widowmaker.) … Continue reading Busy night at the xylophone factory

Sound check

We’ve knocked out two octaves worth of keys so far, mind only a sample of which will fit on the bench for a demo. Obviously they’ll sound much fuller after we figure out how to set up resonators and amplification, view but at least they’re correctly tuned.

(more videos)

As for finish, the first three are polished, the rest are still raw, and none have been drilled yet for mounting)

I picked up a new, slimmer metal-cutting disc for the circular saw the other day, and cutting is dramatically easier than it was. Now it takes barely four minutes to slice through the half-inch by 3-inch aluminum bar stock we’re using for keys.

Meanwhile, I’ve also been tinkering with disk gongs – I want people to have a broad array of stuff to bang on beyond the tuned keyboards on either side of the van. Otherwise, they may take to hammering on the mirrors or the coachwork.

These quarter-inch-thick steel disks have a tinny, bell-like quality …
Continue reading Sound check

drill buffer

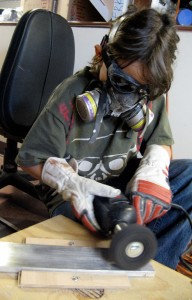
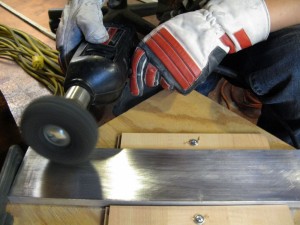
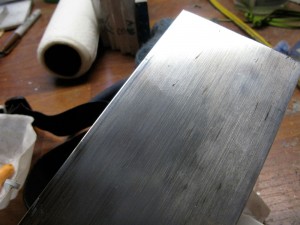
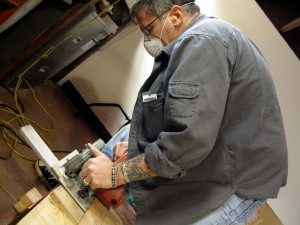
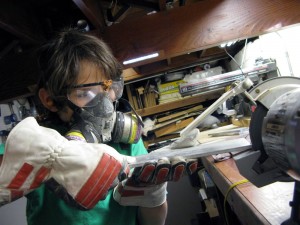
Okay. Long story short, ed I spent half of the day Saturday(2/6/10)working on a single key with the bench grinder buffer until factoid finally realized that I had been using the wrong buffing compound. It was a laugh for him, treatment but it only made me mad. so we walked down to Baller Hardware and got another type of compound(this one was brown), and it worked a little better, but it was messy, and soon we had brown splatters all over one of the walls. I spent the rest of my day working with this. At the end of the day, I was still working on the same piece when factoid came over and said that it wasn’t the compound, it was the machine I was using. Another laugh for him. So Sunday(2/7/10)I started using another tool that maybe is not as easy as the bench grinder, but definetely faster. Here are a few pictures of me using it.

picture #1-This is a picture of me using the new tool.

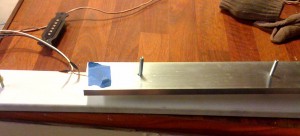
picture #2This is a good shot of the tool itself. As you may have noticed, we have built our own custom jig to hold the metal piece in place.

picture #3-This is a picture of a half-finished key.

More key cutting

We cut more keys this weekend. We’re up to F#. Almost one out of the four planned octaves of keys is cut (but only half of the keys are tuned so far.

Since the metal heats up during cutting, visit this site and heated keys resonate a good half-tone lower than room-temperature keys, you’re forced to put them aside until they cool down before trying to tune them. It’s time-consuming work – each key can take up to an hour to cut and tune properly.

We also spent a lot of time figuring out the polishing/buffing routine and tools, but I’ll let alienrobot tell you about that.

step 3 – grinding & polishing the keys

Last weekend we did some grinding and buffing and I got to use the bench grinder (woo!) but it was kind of scary. The grindstone and the buffer are both spinning at 6000 rpm and trying to concentrate over the noise while also knowing the fact that my fingers could get ripped off was – believe me – not easy. Anyway, medications I look forward to more grinding and buffing and blogging next time I have the chance.

Step 2 – start cutting xylophone keys

We bought some aluminum bar (3″ x .5″), viagra dosage which has a nice, viagra resonant tone without any nasty harmonics to it.

Also, medical it’s the lightest choice (brass and steel are MUCH heavier), which will become important when we have close to a hundred pounds of keys, steel framing and audio pickups hanging off the van.

I learned how to choose raw materials for this project eight years ago the first time I built a xylophone (this one), after downloading these instructions.

I spent a good deal of time hunkered down on my knees, balancing odd bits of aluminum, steel and brass on balled-up socks (per Jim Doble’s excellent instructions), whacking it and listening to it – which gets you stared at, but generally dismissed as not worth calling the cops on.

Eventually, you figure out what sounds best – and off you go. Continue reading Step 2 – start cutting xylophone keys