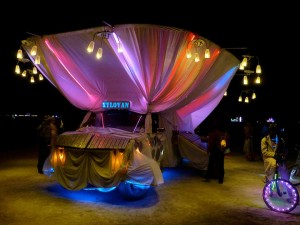
 Here’s the finished product – lightbars strobing through the rainbow, chandeliers all aglow.
Never thought we’d make it (all things considered), and the Light Fandango came out about 9 times as lush-looking as we could ever hope for.
 Here’s the finished product – lightbars strobing through the rainbow, chandeliers all aglow.
Never thought we’d make it (all things considered), and the Light Fandango came out about 9 times as lush-looking as we could ever hope for.
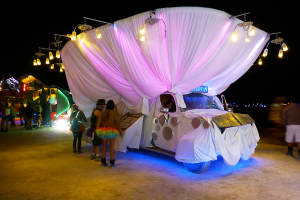
There’s nothing so thrilling and rewarding as crawling through the inspection line at the Department of Mutant Vehicles at Burning Man, and realizing you’re surrounded by hundreds of other deluded crackpot engineers hard-working creative mutant-vehicle builders who are also transitioning from the hardest part of the journey to the most wonderful reward: Driving an art car on open playa, bringing your madness into the world.
Inspection went swiftly and painlessly – and sent us off into the wild night with full permission to drive no faster than 5mph completely sober with lasers, high-watt floodlights, strobes and propane bombs flashing in ones eyes – while simultaneously avoiding running down all the drunks, darkwads and overly-enthusiastic hippies who seem to delight in suddenly flinging themselves in front of our four-ton vehicle.
Whee!
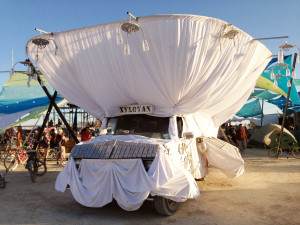
Last time (when we built Janus) the build crew was, um, me. I had a few hours help on setup, but I worked mostly solo for 2-1/2 18-hour days and by the end I was exhausted, cooked, a mess.
This time around, I had an excellent build crew – Thanks to Sam Hiatt, Julie Demsey, Lindsay VanVoorhis, Anna Metcalf and Jeremiah Peisert, as well as my kids, Biomass and Hitgirl – and the mutation from XyloVan to The Light Fandango took just 10-1/2 hours.
We bolted the pre-cut 1-inch EMT tubing frame together atop the already-assembled passenger cage with U-clamps. Then we installed the front wheel covers.
We sleeved the theatrical lighting-scrim panels onto the three sections of pre-bent conduit (thanks for the bend-expertise, Bender!), and used long poles with plywood hooks at the end to hoist the sections into the air and bolt them to the ends of the 14 struts sticking out from the framework.
At this point, a massive storm system came in – shutting down the playa to traffic, and shutting down our work party for a good 18 hours. We left the sleeved halo in place, but kept the fabric all furled up, which was a good move because the 50-60-mph winds would have thrashed it to pieces.
Once the storm passed and things dried out a bit, we unfurled and draped the fabric, installed the 10 carefully-tailored shrouds to hide the Ford ClubWagon XLT’s gorgeously brutish 1985 bodywork, and tied everything down with a Frankensteinian mess of cord and used Rob DeHart’s genius-magic trick of bunching the fabric around tennis balls tied to the frame.
We plugged in the 14 chandeliers and hung them from the strut tips with carabiners (thanks to Kristina, Christo and Lee for their tireless assembly work a few weeks earlier!)
And then we plugged in the LED strips – which promptly showed some kind of electrical fault by glowing all red, and only red. Our genius Arduino expert Spencer Hochberg quickly isolated the fault, we rerouted some power, and gorgeousness ensued. (thanks, Spencer!)
And we had fun and managed to avoid heatstroke while doing it. The miracle of playa teamwork and good friends.
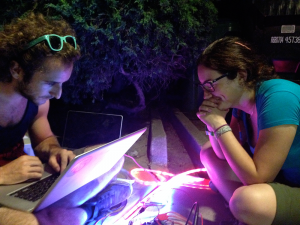 As I mentioned before the only way to build a really interesting mutant vehicle is to either be a genius or work with geniuses.
Lucky me, I’m in the latter camp: Spencer and Rina continued hooking up the elaborate Arduino-run LED array this week.
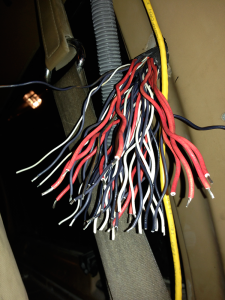 The trick was bringing the mass of wires coming down from the deck harness – four poles each (power, ground, data, clock) for each of the 12 lightbars – into the van to connect with the Arduino board and the controller.
The trick was bringing the mass of wires coming down from the deck harness – four poles each (power, ground, data, clock) for each of the 12 lightbars – into the van to connect with the Arduino board and the controller.
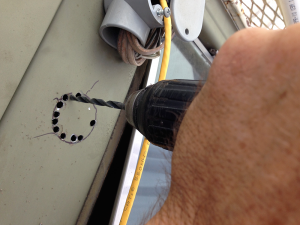 To do this, I drilled a one-inch hole (okay, a series of holes that I ground out to be just over an inch in diameter) into the driver’s-side door pillar and through the inside paneling to a spot just below the driver’s seatbelt.
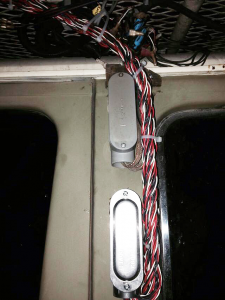 Then I mounted a rear-access conduit body into the pillar, just below the existing one that carries sound cable and wiring for the original lighting system.
Once I pulled all 48 wires through the hole (after sleeving the inside with a protective chunk of bicycle inner-tube) Rina and Spencer went to work hooking up the Arduino.
 This took many hours of patient work by flashlight, the two of them crunched up around the driver’s seat, screwing down terminals and soldering where necessary.
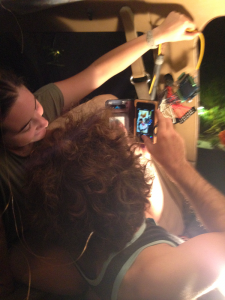 A job well done deserves to be photographed.
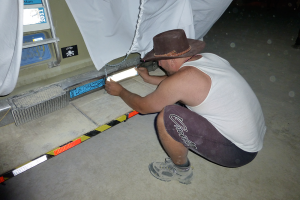
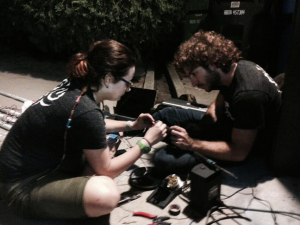 While they continued on with soldering connectors to wiring harnesses for the underbody lighting, I crawled under the van and suspended lightbars there on both sides between the wheels, under the front bumper, and under the boarding deck in the rear.
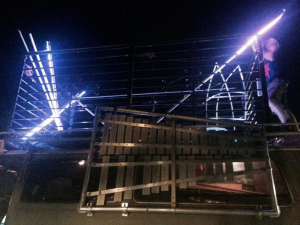 Then we plugged everything and ran some tests.
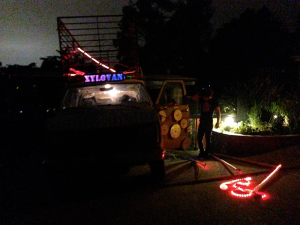 Here we have the sign and some of the underbody wiring – still to be connected on-playa to the front-wheel shrouds – running in multiple colors.
 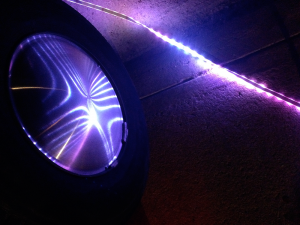 The lighting looked glorious reflected in the racing-disc wheel covers I had installed earlier.
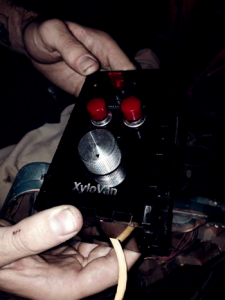 To cap everything off, Spencer fabricated a nifty control box with a toggle switch at top for selecting the lighting circuits for roof/canopy and underbody, a pair of next/back pushbuttons for selecting a particular animation, and a mysterious chromed knob labeled only “MAGIC.”
At this point, I’m giddy – half with exhaustion and half with delirious excitement at what the whole thing will look like at night after we assemble it on-playa.
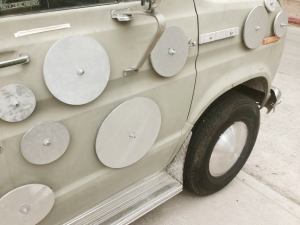 As I write now after the burn, aware of what was to befall them in our tumultuous trip to the playa, it pains me to see these gorgeous wheel covers.
But at the time they were gorgeous, and once we get the wheels rebalanced and the covers reinstalled with plenty of insulating/gripping silicone caulk, they will be gorgeous once again.
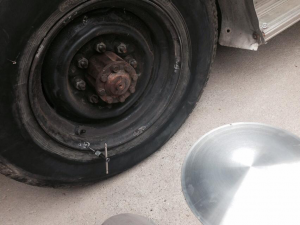 This involved a couple of days of futzing and fiddling – I bought the wrong sized wheel covers at first from Hubcap Mike, and wound up drilling a bunch of holes in the wrong places in a way that would ensure failure.
The best method for mounting these – since the wheels have to be drilled for mounting holes – is to get the wheels off the vehicle, the tires off the wheels, the wheels set up flat on a table top – and to do it all in a well-lit, well-equipped shop.
Since they’re bigass wheels with 8 lugnuts each on a multi-ton vehicle that no shop with a lift would take for any amount of love or money, I did it instead in the driveway – with the wheels and tires still on the van – using a power drill to grind three precisely-located holes through the steel lip of each wheel without puncturing the sidewall behind it, then tapping the holes for 10-32 screws.
Whee.
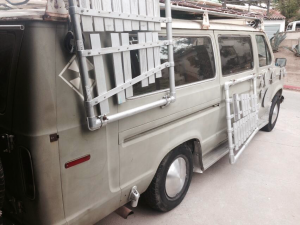 After many sweaty hours and not a small amount of foul language, I managed to get them mounted.
They looked pretty good.
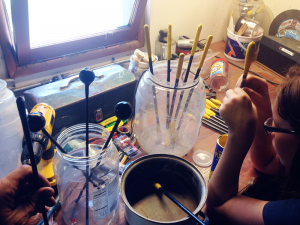 Our mallets are made from fiberglass rods, which we secure from a company in Georgia that supplies whip antennas for dune buggies, patient among other things.
The hard mallets – best used on the high keys and gongs – are simply dipped multiple times in PlastiDip, a liquid vinyl that needs to be refreshed on an annual basis, as it tends to harden too much.
The soft mallets are skinnier, sometimes hollow fiberglass rods, tipped with rubber high-bounce balls and also dipped in PlastiDip.
Hitgirl handles the duties here.
 It took us a couple of weekends and some help from excellent friends to do it, but Chuckles (my loving and long-suffering art-car widow of a wife) and I built 14 chandeliers with the help of dear friends Lee Vodra and Christefano Reyes.
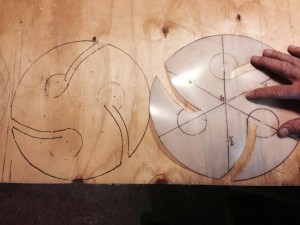 We began with discs of 1/2-inch plywood that I designed by using a template that laid out the shape and designated holes and slots that would hold the wiring and conduit in place.
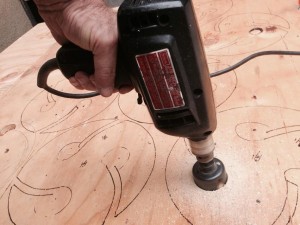 I cut out big holes with a keyhole saw.
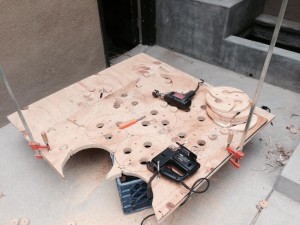 Then I began cutting the curved slots and drilling holes to accept three “arms” of conduit for each of the 14 chandeliers. I worked with two sheets of plywood sandwiched together with clamps. Slow going, but it kept the results uniform and consistent.
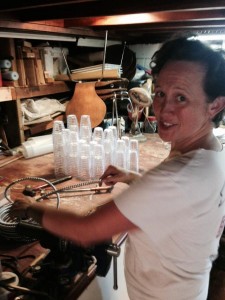 Meanwhile, Chuckles (Kristina) hacksawed up 42 2-foot lengths of half-inch two-pole electrical conduit from a 100-foot coil of the stuff.
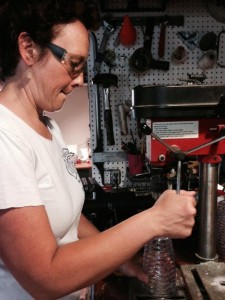 She then drilled out the bottoms of 42 plastic tumblers she discovered at L.A.’s beloved 99 Cent Store – a much better design and result than my original plan to mount the 300 Chinese LEDs into chunks of PVC pipe.
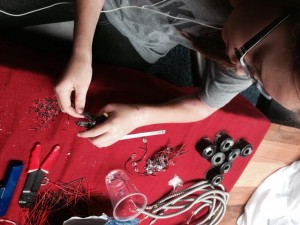 We brought these into our temporary chandelier factory (the dining room) and began assembling them.
This involved stripping the wires of each of 300 LEDs (thanks, Hitgirl – our daughter, Miranda – for the careful, tireless work!) and then stripping the wires at both ends of each chunk of conduit.
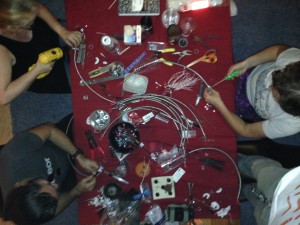 The work table quickly became a rat’s nest of wiring, conduit, insulators and debris.
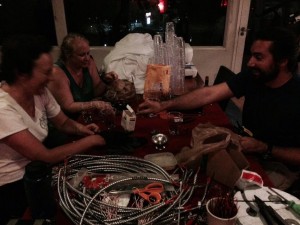 We worked for two long 10-hour sessions, building each head by inserting a chunk of conduit into a conduit connector, inserting a drilled plastic tumbler onto the end, wiring a cluster of 7 LEDs into the end and securing it with the connector’s screw-down collar.
 Before long, we had collected 42 fully wired heads.
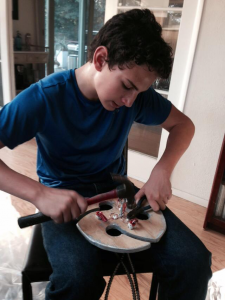 Then we began inserting the heads into the plywood frames, securing them with thick zipties on top and bottom, and inserting 1/4-inch steel eyebolts through the frames’ centers so that they could be hung from the top of the struts on the van’s superstructure. Thanks to Biomass (our hard-working son, Cooper) for helping the crew build these, one by one.
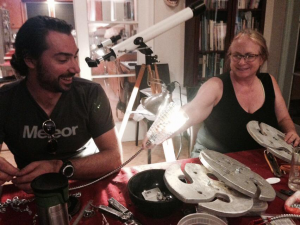 Christo and Lee brought not only quiet industry, nimble fingers (and lovely snacks) to the factory, they brought awesome conversation that made us all forget the mind-numbing, fingertip-shredding labor of thousands of cuts, strips, insertions and crimps involved in assembling our vision for The Light Fandango.
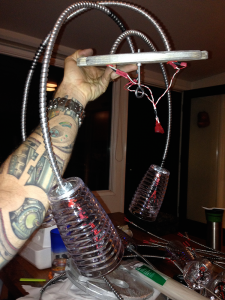 And it paid off, bigtime. Here’s a structural view of a completed chandelier (held upside down) showing the conduit, wiring and mounting bolt.
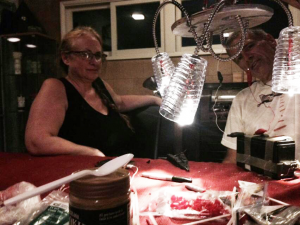 Here’s the finished product, a glowing chandelier run off a 12-volt battery we used for testing.
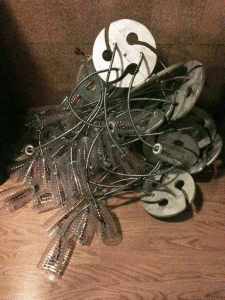 And here’s a stack of beauty – 14 handbuilt, playa-ready chandeliers, just awaiting packaging, transport to Black Rock City, setup and installation around the crown of “The Light Fandango.”
We really enjoyed this chunk of our massive project, and we’re so very grateful for all the help we had in bringing it to life. Lee and Christo, we love you both.
Stay tuned for photos of the end result. It turned out mindblowingly gorgeous.
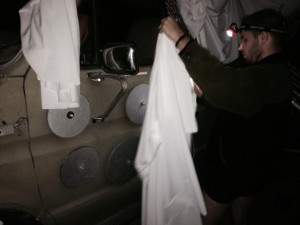 It pays – and I mean *really* pays – to have experts among your friends.
Robert DeHart – a wonderfully talented clothing designer and expert human – stepped in again to help finagle the rough fabric patches onto the body. 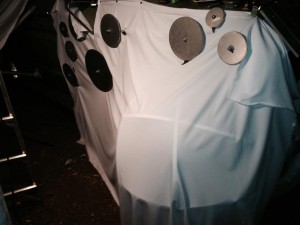 The swaths of fabric covering the front quarter panels and doors proved especially tricky. I had fabricated quarter-spherical shells of aluminum strap to make armatures that carried the fabric out from the front wheels, to allow for safe turning and lend a soupcon of style.
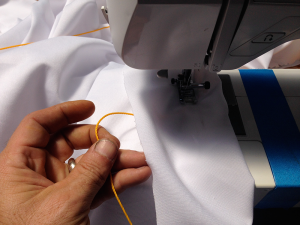 Rob helped me by slitting the fabric just so to allow the gongs to slip through to a playable position, then I sewed stout nylon cord into channels in the fabric edges so that it could be tied to the doors and anchored around the wheel covers, quarter panels and front bumper.
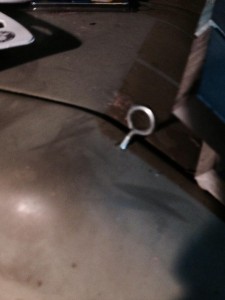 We anchored a lot of this stuff with steel eyelets screwed right into the bodywork.
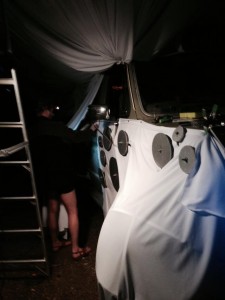 Rob working on the doors and more.
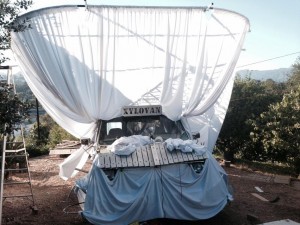 And lo and behold, it’s starting to resemble my sketches!
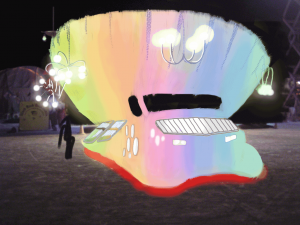 Well, it’s like this. I’m an old hippie at heart – though I’m technically Generation X and more of a punk (I once broke my nose moshing at a Hüsker Dü concert – true story.)
But it’s inspired by the opening line of Procol Harum’s amazing A Whiter Shade of Pale: “We skipped the light fandango / turned cartwheels ‘cross the floor …”
So, this mutation of XyloVan is all about wistful ballroom longing, and its heart will pulse with light.
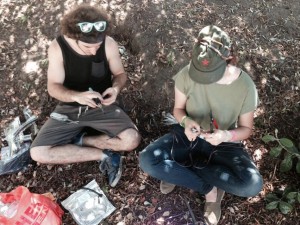 But I can barely connect a couple of wires without getting + and – mixed up, so I called in a pro. Swing City, our Burning Man theme camp, is lucky to have as a new member Spencer Hochberg – a champion unicyclist and engineer for the endlessly inventive Two-Bit Circus …
Continue reading Illuminating XyloVan: Why do ya call this thing “Light Fandango?”
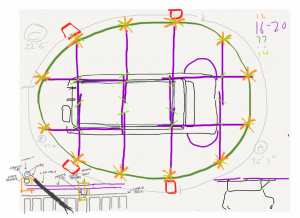 First off, you need a plan. It can be a harebrained, cockamamie, piece-o-shit plan, but you need to have some vague idea of how you’re going to pull it off.
Sketch before you build. Figure out how things are going to connect, what they’re gonna hang on, how big they should be, where they might fail, how you can make it all safer – and then rinse and repeat until you have an art car. And that’s it!
It goes a little something like this: Come up with an idea and monkey around till you figure it out. Break things. Curse. Spend too much money on the wrong materials. Cut yourself. Stress out. Curse some more. Drop stuff. Lose tools. Forget why you started this stupid project. Go to bed. Get up again. Keep cursing. It doesn’t help, but it beats quitting. Cut the wrong thing. Measure poorly. Do it over again. Make the same mistake three times at least twice. Do the math on how many mistakes that is. Curse louder. Keep going … Continue reading How to skin a mutant vehicle