
The sound inside the kit is kind of glorious, but I think during a fight it will be hellaciously loud. Might need to hand out earplugs to the fighters. I’ll be working on arm protection next. And maybe some smaller noisemaking items.
Category Archives: Video
GONG FIGHTS – helmet test
It works. More to come.
Veering off into left field – to build a marimbula
This is a long way from xylophones and propane-tank drums, but I’ve really enjoyed building cajóns and – for the first time – a marimbula.
The marimbula is a Caribbean instrument, descended from the African kalimba, and generally functions as a bass. As you’ll see in the video at the bottom of the post, I first experimented with a 6-key marimbula built onto the back of one of my cajons, just to figure out the basics of construction.
This one is a 16-key marimbula – which I’ve decided has about three too many bottom-end keys and perhaps one too many high-end keys, as the sound quality falls off quite a bit at the ends of its scale. Next, I might try building one like a piano keyboard (with two layers of keys in white and black) centered in the middle of this scale.
The tuning has been kinda challenging – I finally settled on D – but I’m tuning it slowly by ear because the digital tuning apps can’t handle all the overtones it puts out. Anyway, it’s a helluva lot of fun to play – particularly on a nice, resonant wood floor – because it’s easy to play, and the notes send vibrations through your butt and up your spine. I take great satisfaction in building instruments that create physical joy along with pleasant music.
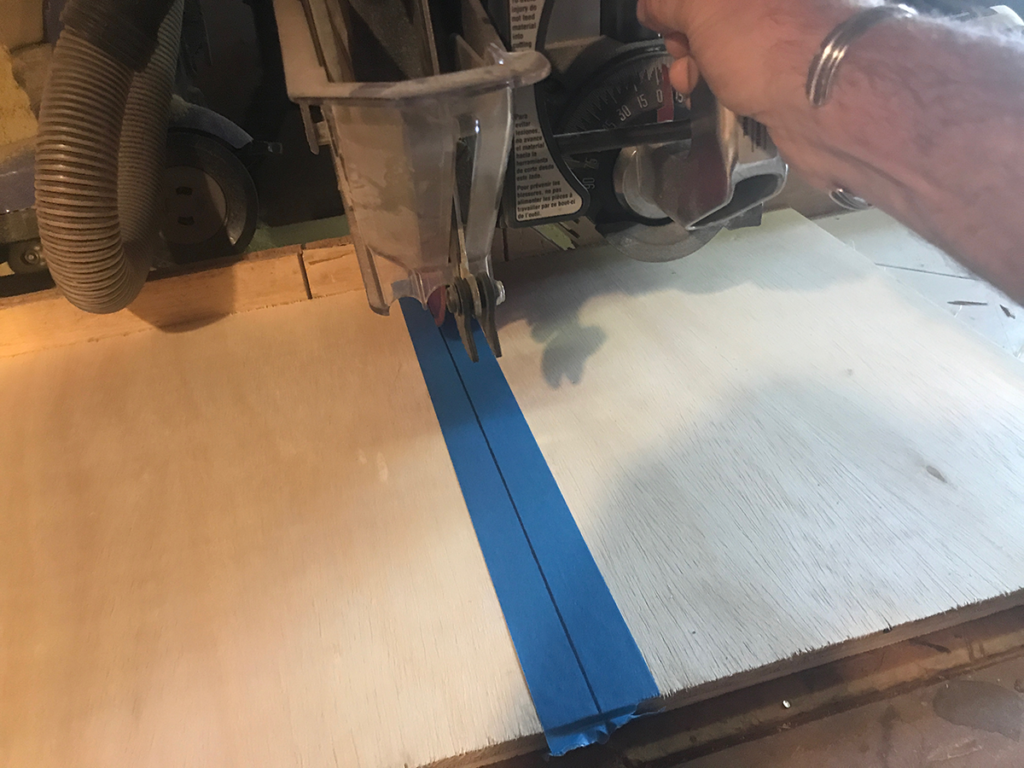
I use white birch finish plywood. I cut the box pieces through masking tape, which makes for clean cuts by keeping the blade from shattering the delicate veneer. 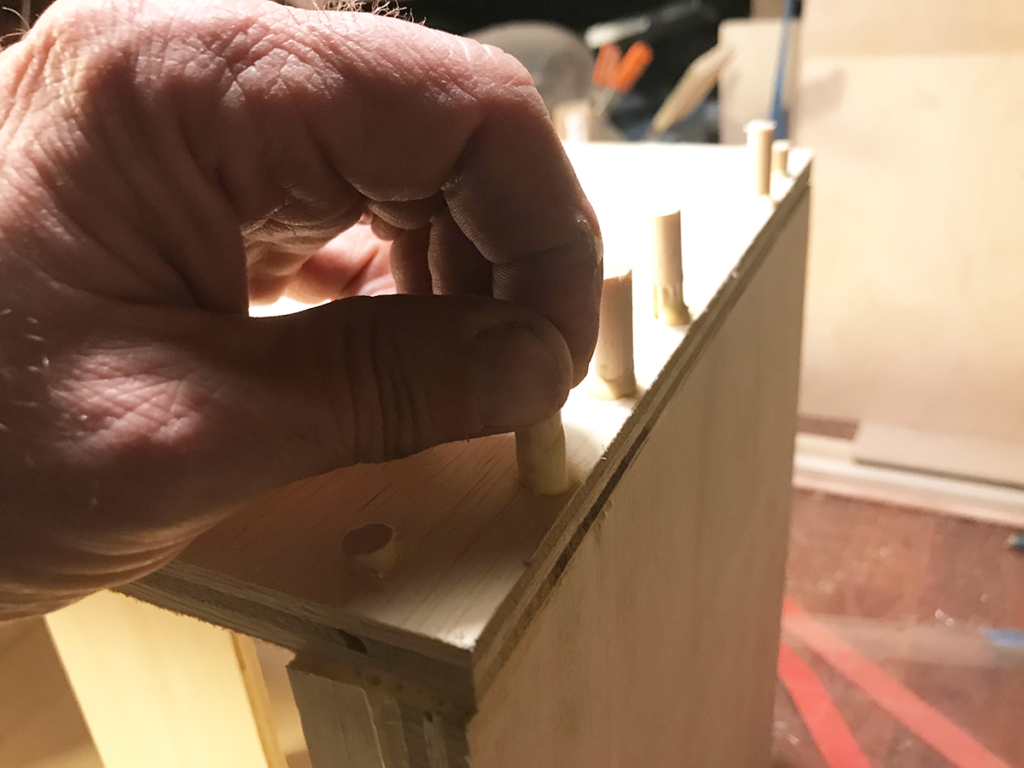
Dry-fit the pieces, then drill for pegs. I cut my own from 5/16″ dowels, which makes for cleaner joins than you get with factory-made pegs. 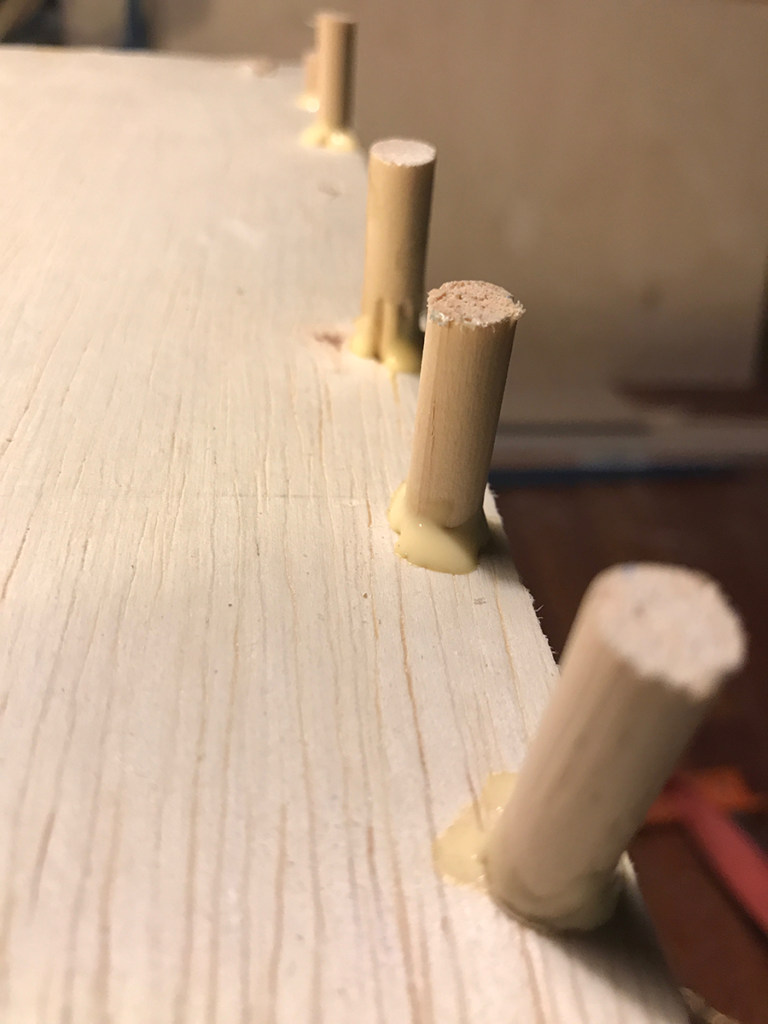
Glue all the plywood points, then add some glue to the peg holes … 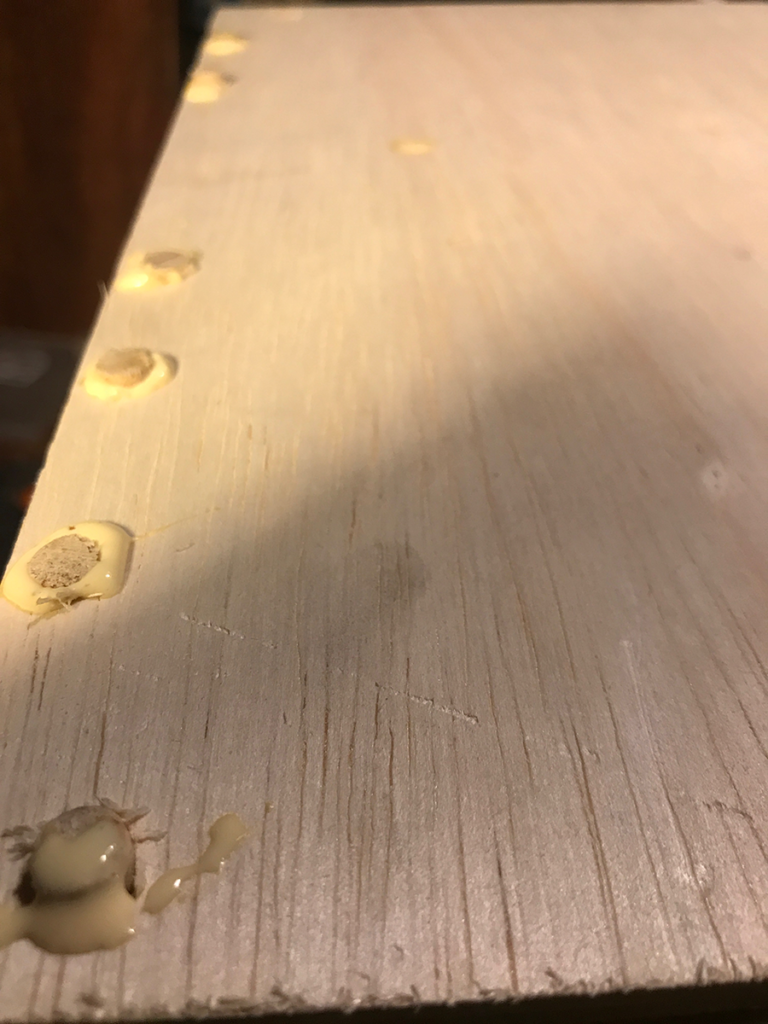
… and drive them all in. I’ll sand off the excess to make them flush with the surface when everything is dried. 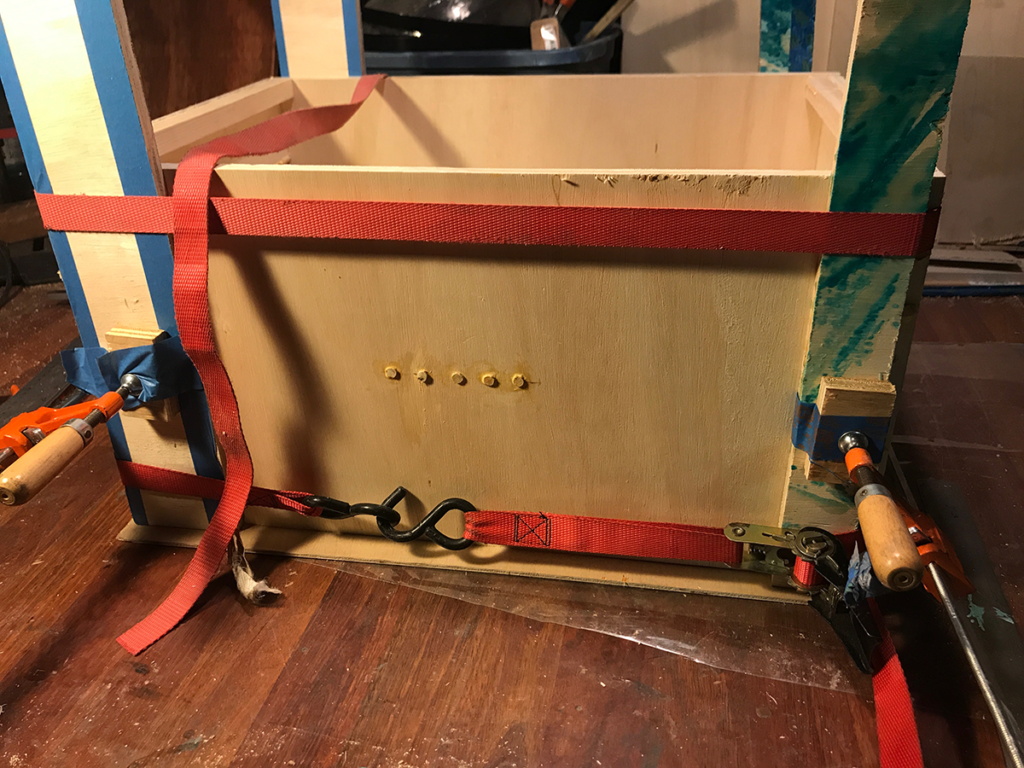
Being short on (pricey) carpenter’s bar clamps, I use the two I have, then augment with ratchet straps. The vertical chunks of scrap plywood keep the straps from damaging the veneer. 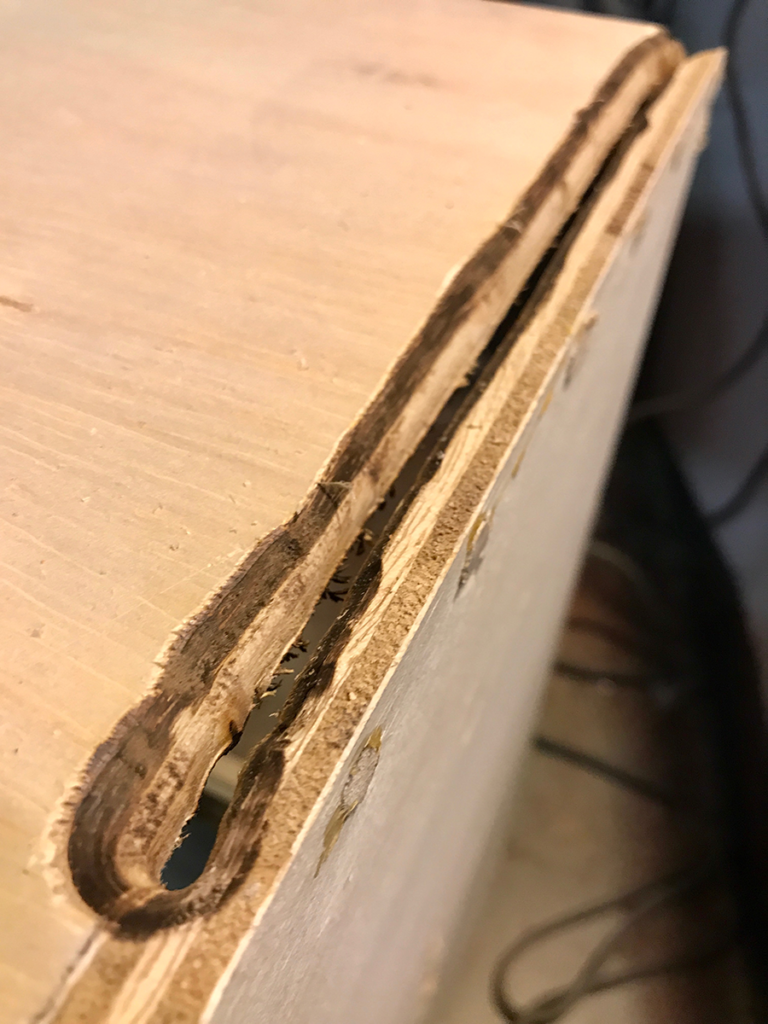
This is deeply embarrassing as well as horrible-looking: I failed t set up the router correctly, then dragged it straight through the face of the box instead of nicely rounding the corners. After much cursing and shouting, I just capped the whole gashed end with another layer of plywood. 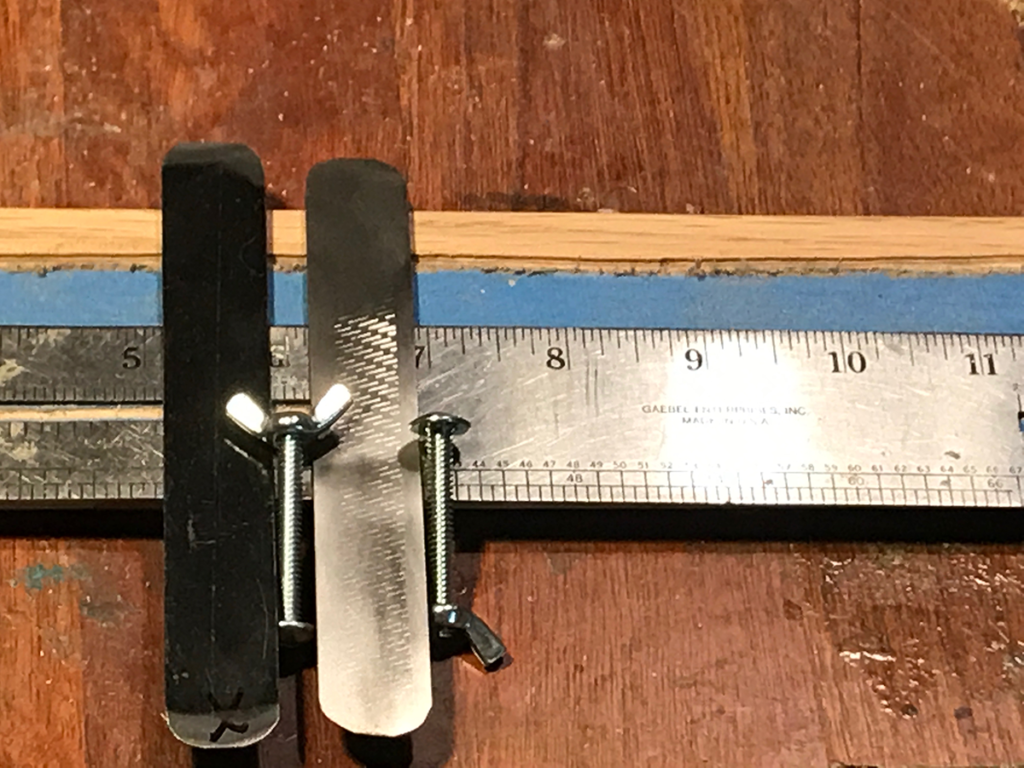
Laying out the keys and the bridge pegs, and trying to decide whether to use the black anodized finish found on these scraps of spring-steel shipping strap, or polish it and use the moiré pattern left by the tools. 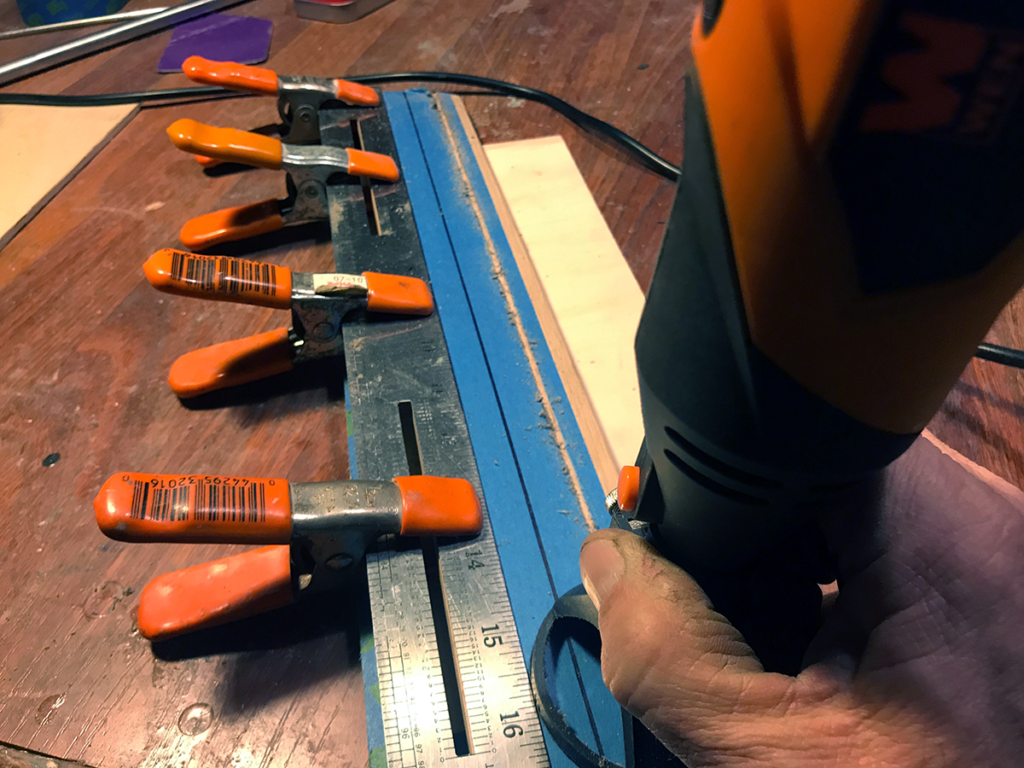
The bridge is a strip of red oak. I clamped a ruler to it to guide the router, which I used to cut a groove for the bridge’s nut bars (terminology?) to sit in. 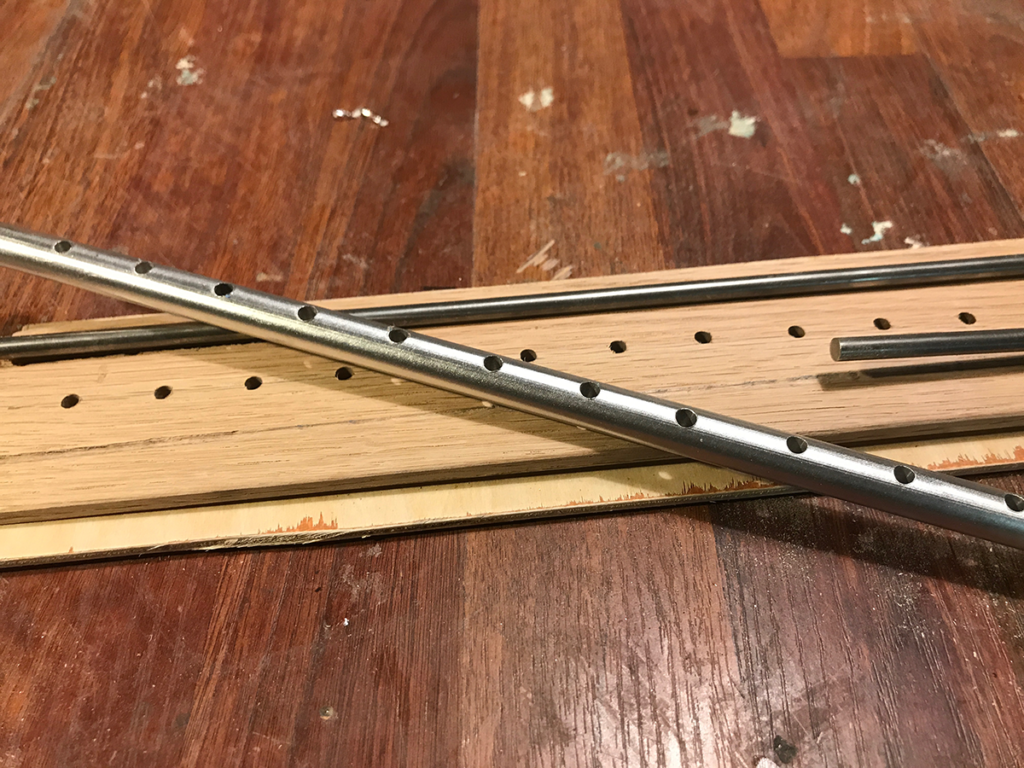
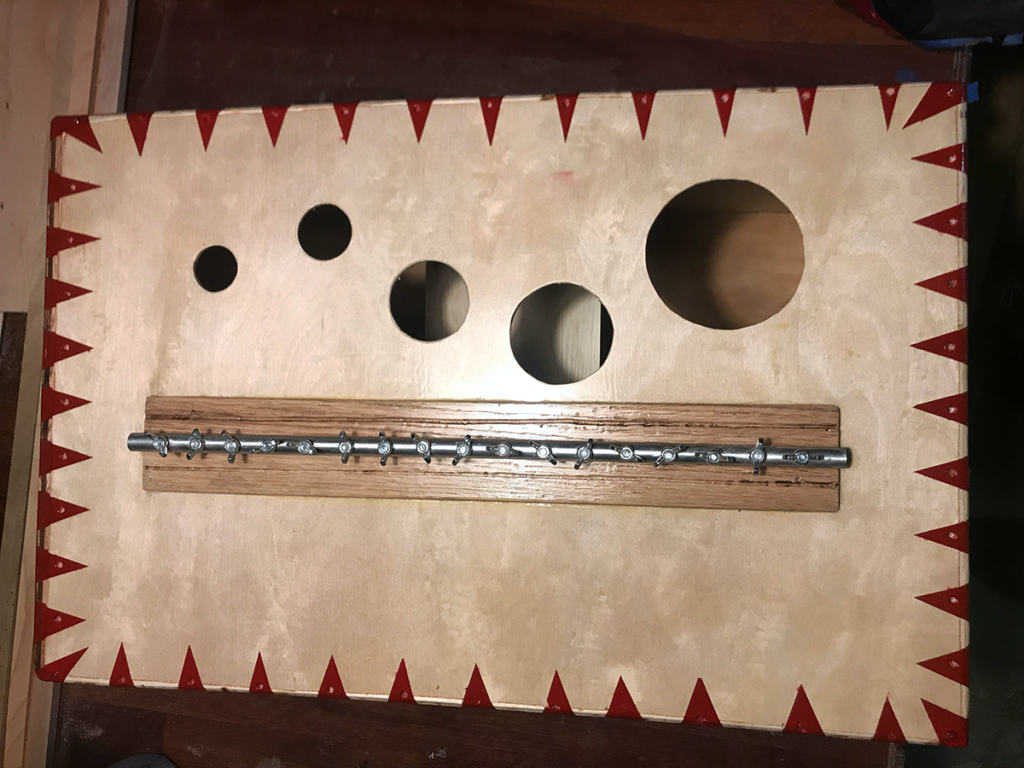
The completed bridge pieces – red oak, stainless-steel nut bars (which the keys will rest on) and a carefully-drilled-out rod of aluminum for the bridge, which will clamp the keys down to the nut bars. 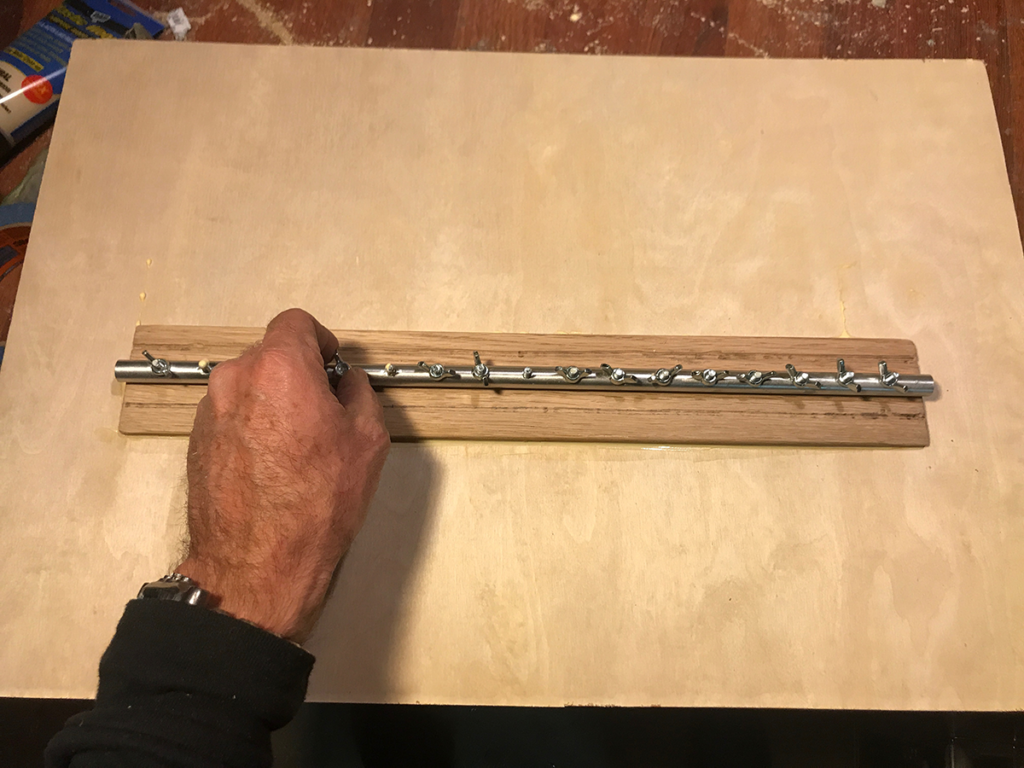
I cut a piece of 1/8-inch birch ply for the face, then drilled it out and mounted the bridge assembly (traditionally called the harp) to it with machine screws and wing nuts. 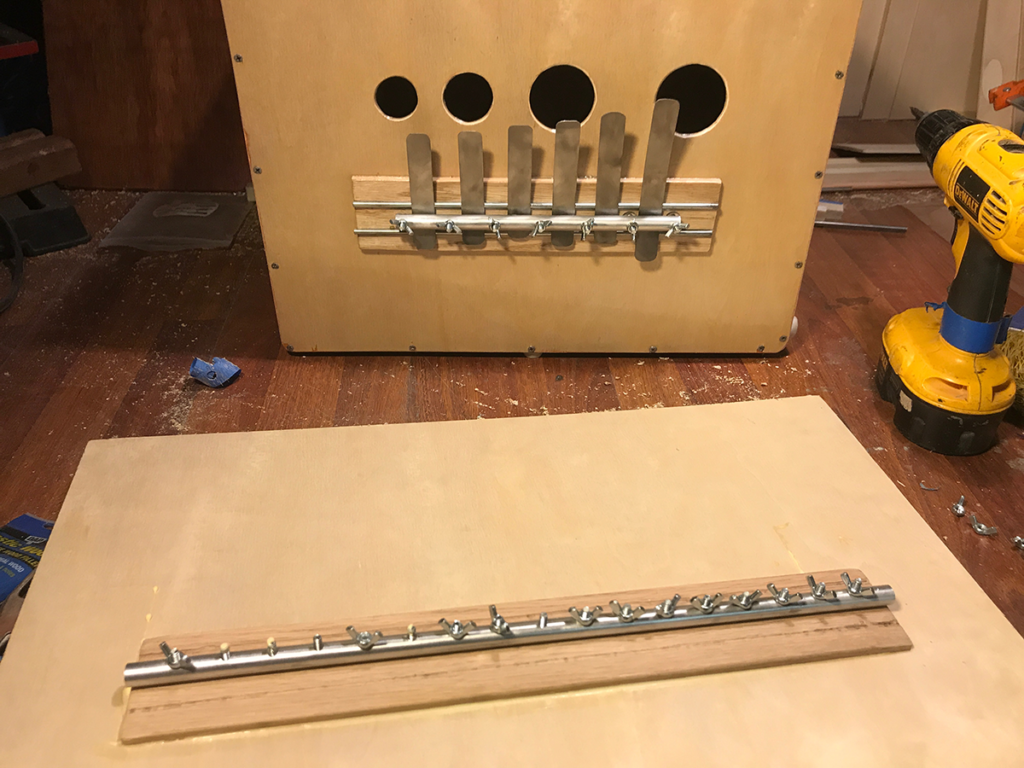
Here’s a comparison of the 16-note bridge with the 6-note bridge I mounted on the cajon that I used as a test mule. 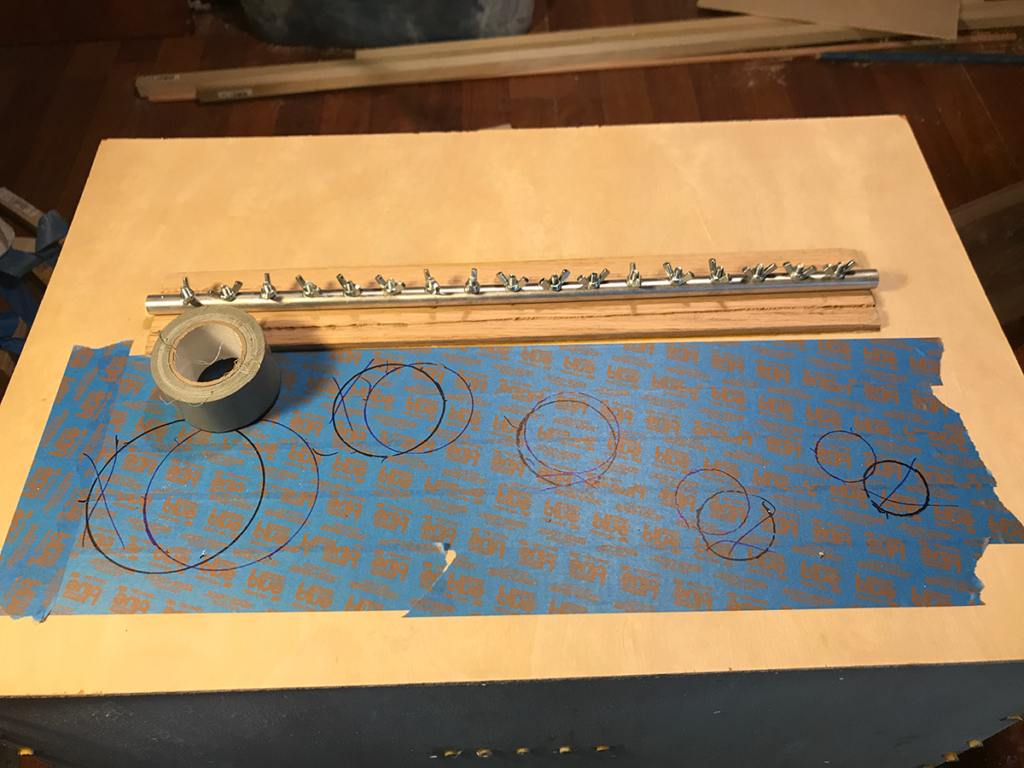
After masking the face to prevent splintering, I laid out the sound holes, then cut them with a keyhole saw (for the smaller ones) and a roto-zip bit on my knockoff Dremel for the two largest ones. 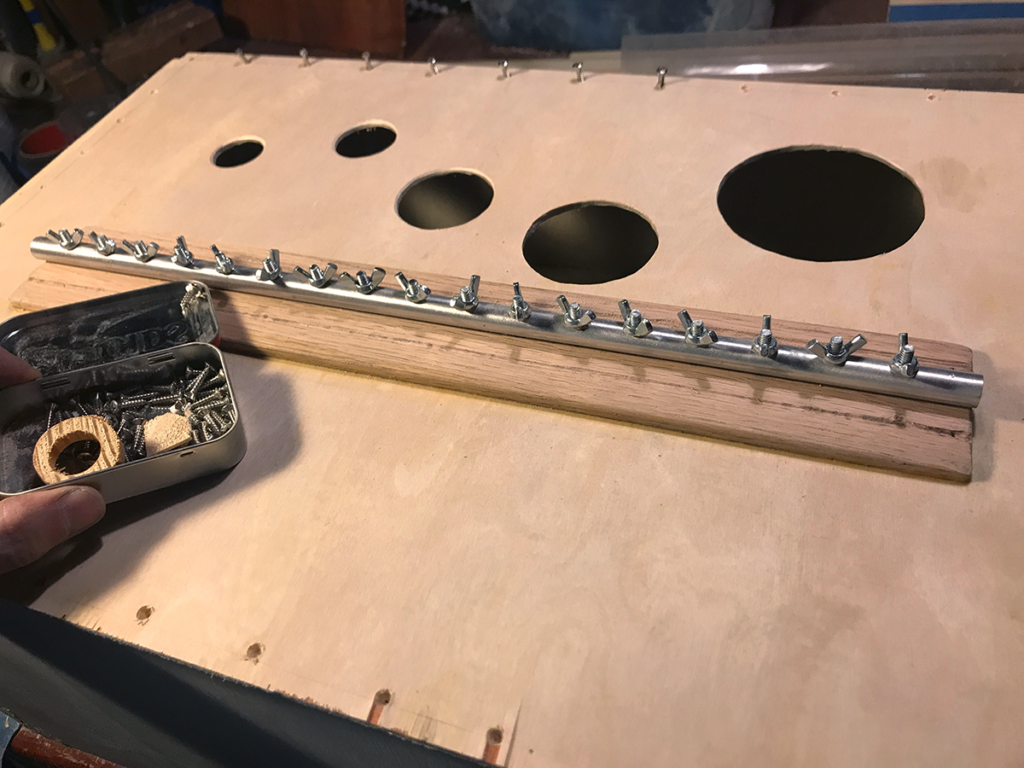
Next, I drilled all the holes for the screws – way too many, it occurred to me way too late, but the large number of screws actually wound up helping the overall visual design. 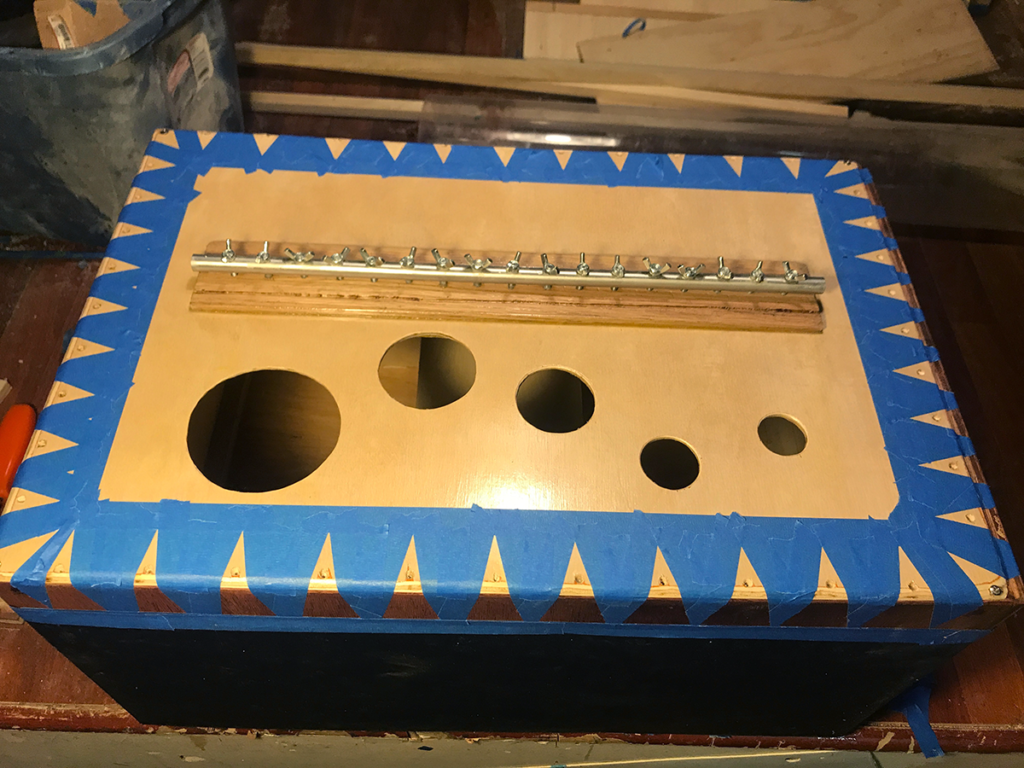
I masked off the edge for painting. 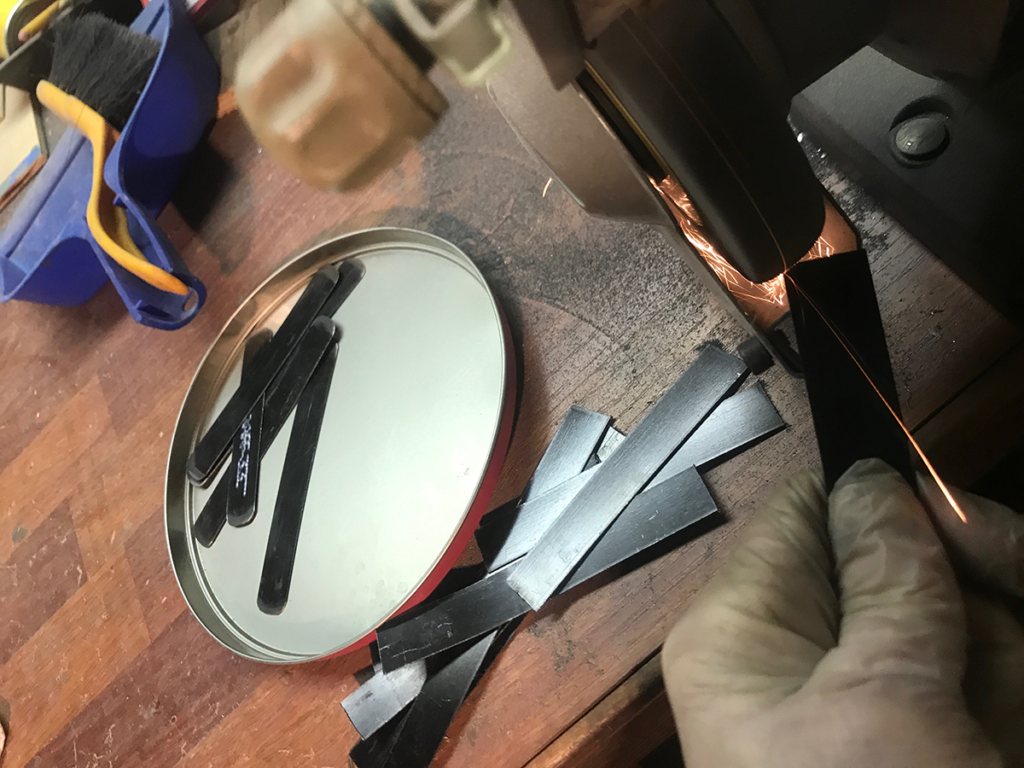
Earlier, I cut the shipping strap chunks into rough lengths with an angle-grinder, then ground the corners round … 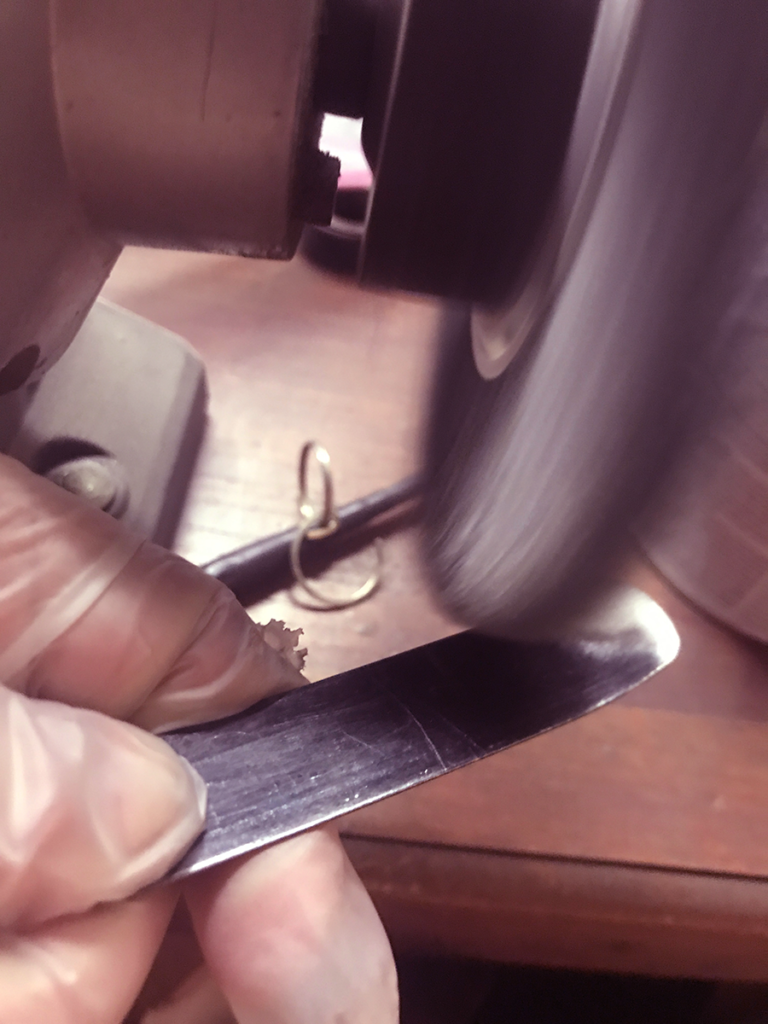
and smoothed them with a wire wheel. 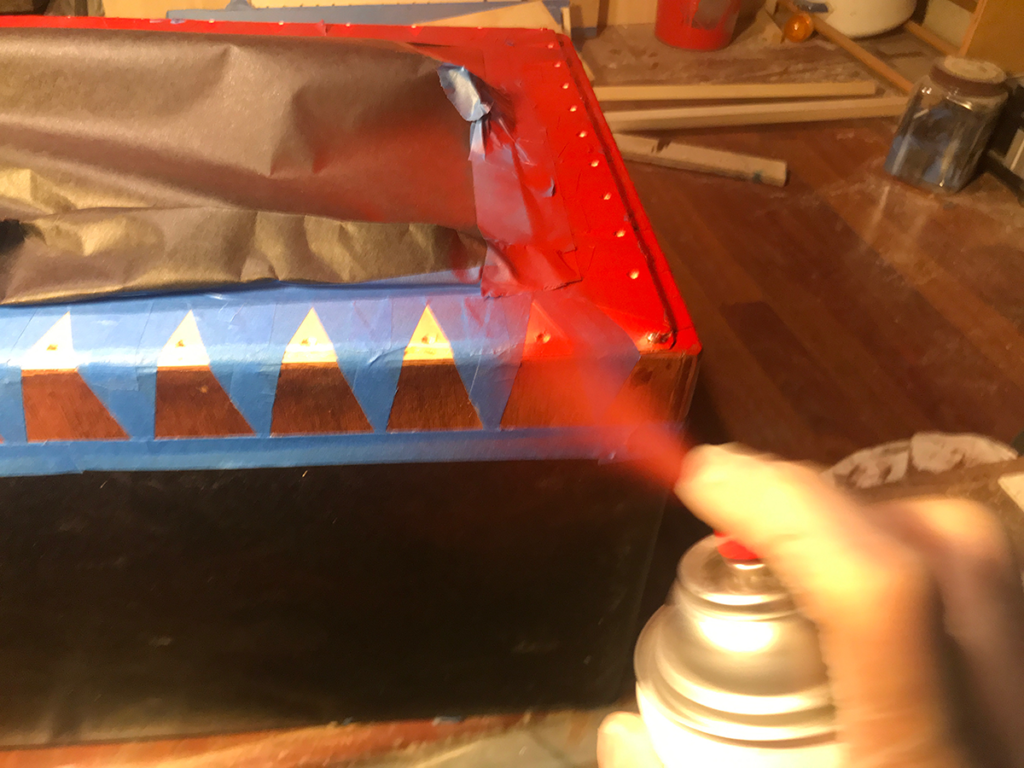
Shot the masked instrument body with red enamel (a favorite) 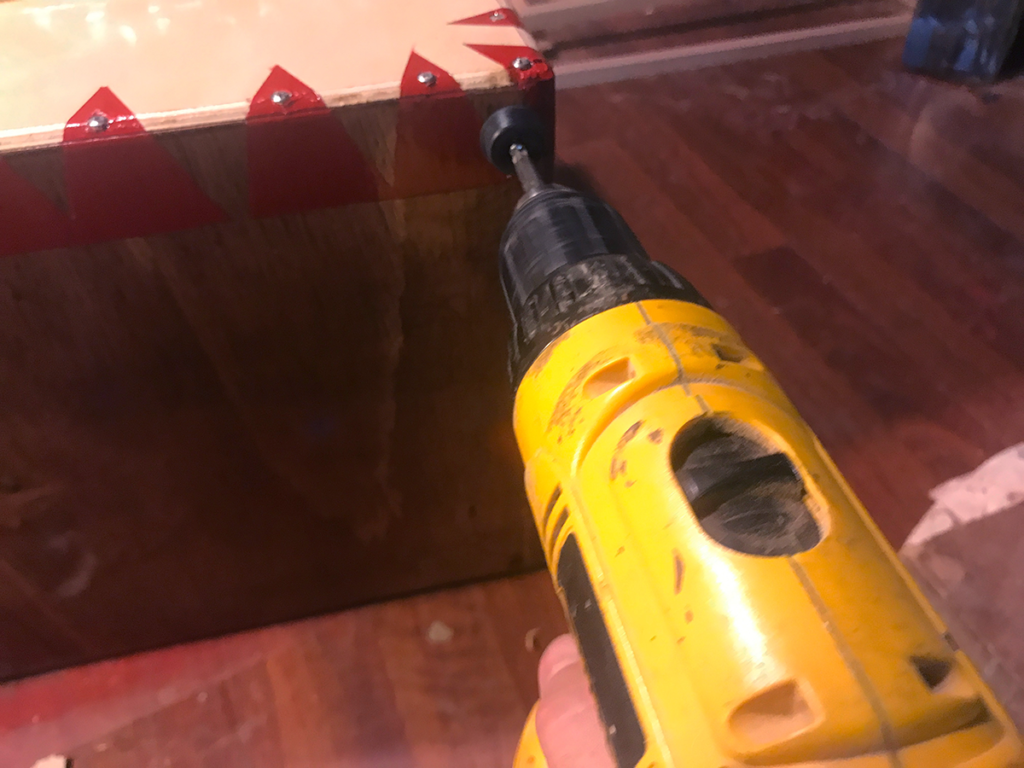
… and screwed on some little rubber feet to protect both the floor and the wood, since you’re meant to sit on the instrument to play it. 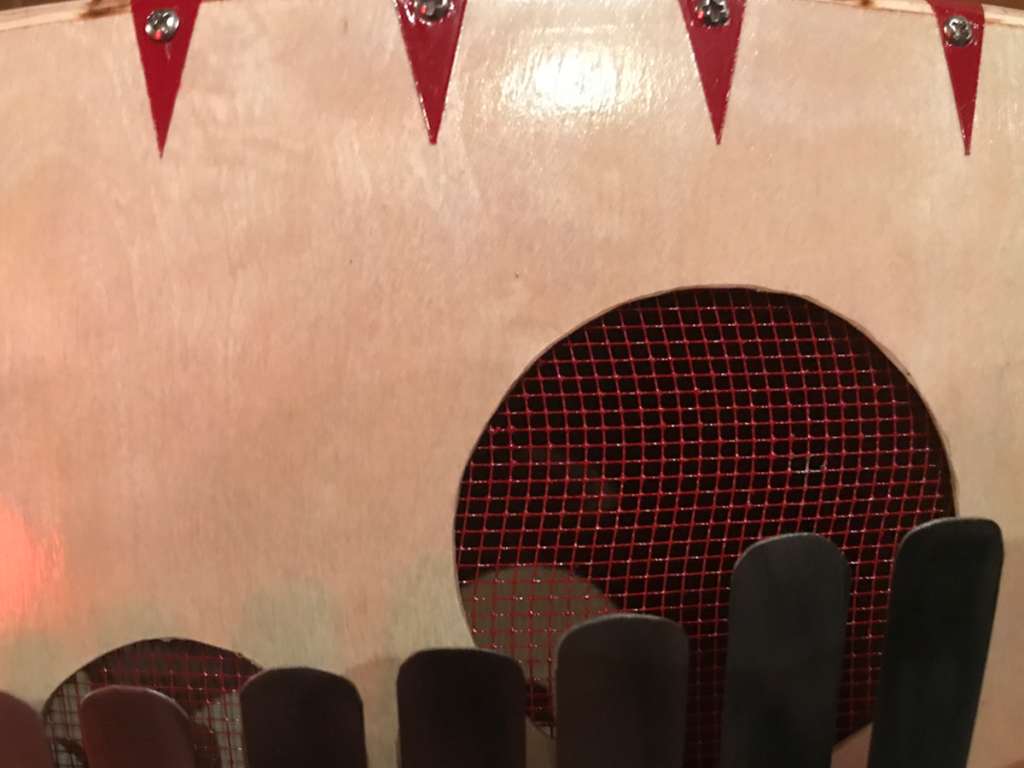
To add a little bit of drama (and filter out toys, crayons and Cheerios that younger musicians might be tempted to insert in the sound holes, I spray painted some metal fabric and glued it to the backside of the face with Liquid Nails so it wouldn’t buzz when the instrument is played. 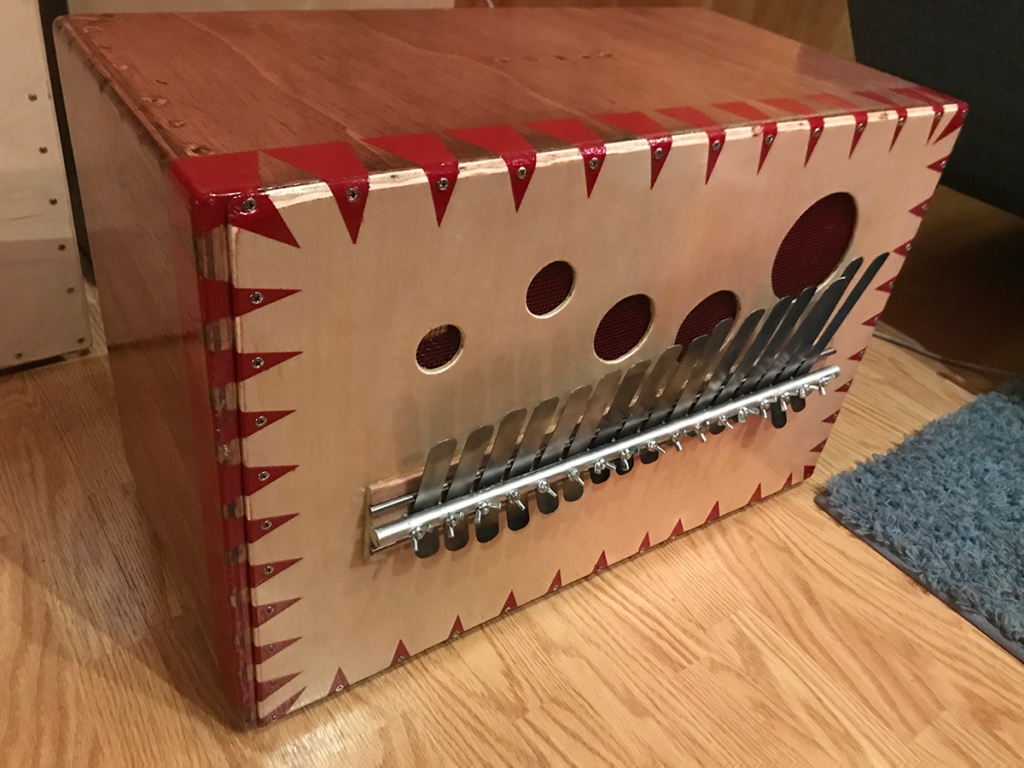
Et voila. 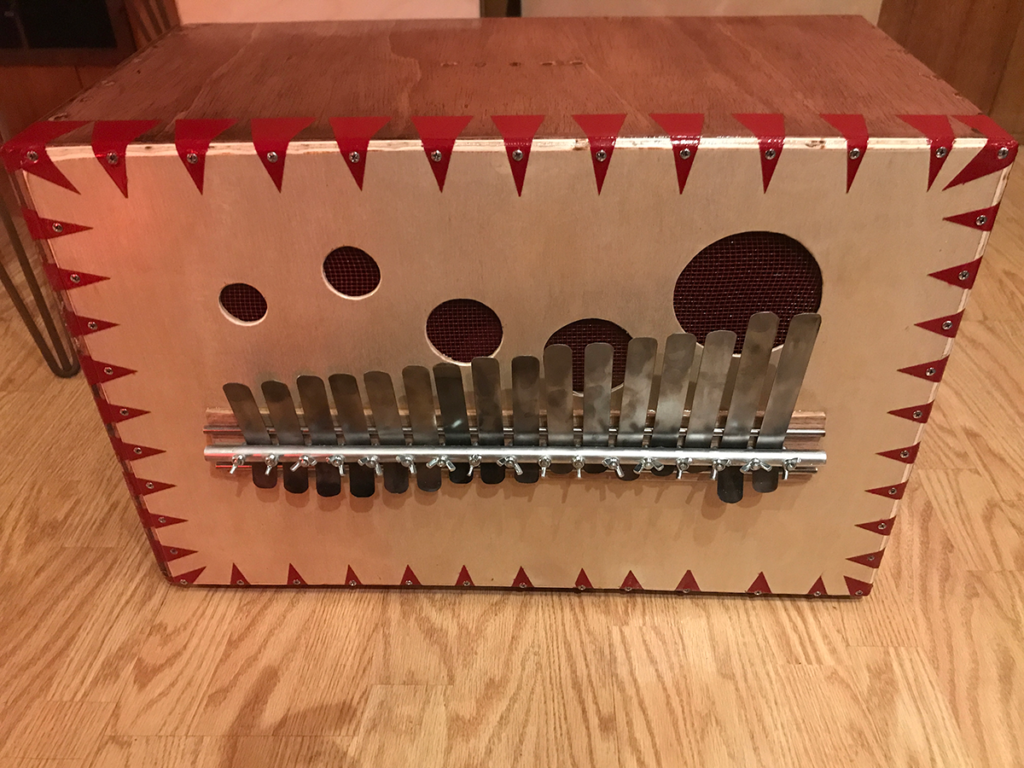
Video: XyloVan at Burning Man 2014
A little sampler of the hundreds of people who played XyloVan at Burning Man, 2014.
XyloVan walkaround – L.A. Decom 2012
XyloVan in full voice – L.A. Decom 2012
Be warned – it’s LOUD. And that makes us happy.
Drumming on XyloVan at L.A. Decom 2012
Contemplative jam at L.A. Decom 2012
Burning Man 2012: Burn Wall Street – and torch that Egyptian god while you’re at it
At some point – say, \next year – we’ll probably quit aiming a camera at the same damn spectacle that everyone else is videoing and actually absorb a burn face-to-face with open soul, unfiltered by a 2-inch screen.
Until then, we’re happy to share these videos of Burn Wall Street and the Anubis burn:
Word from a friend in the Rangers was that the Anubis pyro show originally belonged to Burn Wall Street – but that the Burning Man Organization (BMORG or, simply, the Borg) reaappropriated it because of unspecified unreadiness on the part of the BWS crew.
It was a fine show:
Contemplative Laura
Laura – a multiinstrumentalist who dropped by to discuss XyloVan mallet technology found a mood: